REVIEW · BERLIN
Berlin Photography Masterclass – Private Photography Lesson
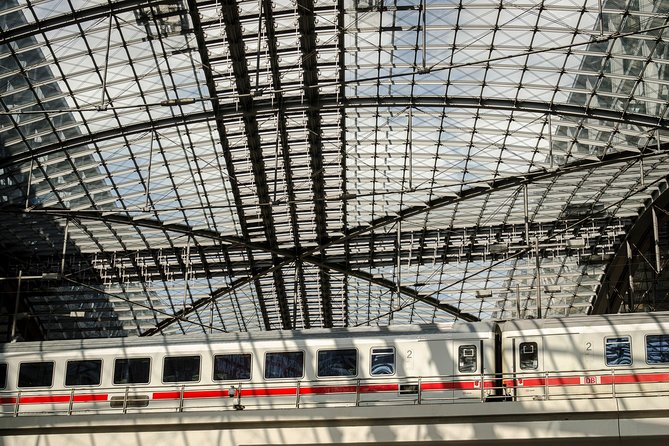
Book on Viator →Operated by Aperture Tours · Bookable on Viator
Berlin is a camera magnet. This 3-hour private photography walking lesson takes you across the city’s most shootable landmarks with hands-on guidance and a route you can tailor to your interests.
I like that you get focused night photography instruction, not just sightseeing, and you’ll work with a professional photographer guide during the walk. The main thing to watch: the itinerary is packed with big sights in a short window, so if you want long, slow time at one location, you’ll need to ask for it.
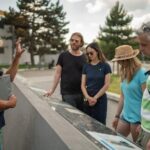
Small group, real feedback, good pacing. With a maximum of 4 people, you’re not stuck waiting your turn, and guides have been praised for being patient while teaching practical camera technique. Still, this is a walking route, so wear shoes that can handle city distances and bring weather-ready layers since it runs in all conditions.
In This Review
- Key things to know before you shoot
- A private Berlin photography masterclass that turns landmarks into photos
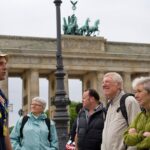
- Where you’ll start: Pariser Platz by Brandenburg Gate
- Reichstag: photographing Berlin’s power building in your frame, not a postcard
- Brandenburg Gate to Potsdamer Platz: symmetry, street life, and setting choices
- Berlin Wall and Alexanderplatz: textures, contrast, and night-ready exposure control
- Oberbaum Bridge and the Modersohntraßer viewpoint: practice reflections and city depth
- East Side Gallery to Nikolaikirche: telling a story with close-up detail and calm composition
- Berliner Dom and Gendarmenmarkt: how to finish with strong architecture shots
- What you learn on the walk: technique coaching you can actually repeat
- Is this good value for $180.04? Yes, if you want coaching, not just sightseeing
- Who should book (and who might want a different type of photo tour)
- Should you book this Berlin photography masterclass?
- FAQ
- How long is the Berlin Photography Masterclass?
- Where does the tour start?
- Where does the tour end?
- Is the tour private?
- What group size should I expect?
- What languages are offered?
- What is included in the price?
- What is not included?
- Does it run in bad weather?
- Is there a cancellation window?
Key things to know before you shoot
- Max 4 people means attention you can actually use during the whole walk
- Night photography techniques are taught alongside daytime landmarks
- You photograph a tight set of iconic Berlin scenes in just about 3 hours
- Your guide can adjust the route to your preferences (private tour feel)
- Picture review and technique coaching have been highlighted in past experiences
- Start at Pariser Platz near Brandenburg Gate and return there when you’re done
A private Berlin photography masterclass that turns landmarks into photos
This is the kind of Berlin tour that makes sense if you have more ambition than time. You’re paying for a photography lesson while you walk, not for a lecture from behind a rope line. In about 3 hours you’ll cover major sights like the Reichstag, Brandenburg Gate, Potsdamer Platz, the Berlin Wall, Alexanderplatz, Oberbaum Bridge, the East Side Gallery, and more.
The price is about $180.04 per person for a 3-hour private session (with a max group size of 4). If you’re the only one booking, you should think of this as a “buy the coaching” experience. If you’re traveling with a small group, the value can feel better because the lesson stays intimate, and group discounts are listed as a feature. Either way, this is best when you want your camera skills to level up fast.
English is offered, and you’ll get a local guide plus a professional photographer guide. One detail I really appreciate is the focus on technique—past guides have been praised for patient teaching and for helping people put what they learned to use later. And because it’s a walking tour, you’ll get to practice your camera settings on real Berlin streets, not just in theory.
Also, book ahead if you can. The average booking lead time is about 23 days, which is a nice hint that this isn’t a “wait until the last minute” activity.
You can also read our reviews of more private tours in Berlin

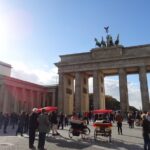

Where you’ll start: Pariser Platz by Brandenburg Gate
The tour begins at Brandenburg Gate, specifically at Pariser Platz, 10117 Berlin. That matters more than it sounds. Starting here gives you a strong visual anchor right away, and it’s an easy meeting point for people using public transportation.
You’ll also end back at the meeting point. That keeps the logistics simple. You’re not mentally tracking a long end-of-day transfer plan—you finish where you started, with your shots and notes in hand.
Because this runs in all weather conditions, you should plan for wind and rain. Bring a light rain layer, and keep your camera protected in a bag or cover if you have one. If you’re serious about night photography practice, you’ll also want to be comfortable in cooler temps, since it’s much easier to concentrate when you’re not rushing to warm up every five minutes.
Reichstag: photographing Berlin’s power building in your frame, not a postcard
One of the first iconic subjects is the Reichstag building. It’s the kind of landmark that tempts you to shoot the obvious wide angle. The lesson approach here is different: you’re there to learn how to compose the building so it feels like a real place in your photo, not a tourist snapshot.
What to think about at this stop:
- Architectural subjects reward you for changing your angle. Even small shifts in position can help you line up straight edges and reduce distracting clutter.
- The guide’s night photography teaching can help you understand how city lights affect your camera settings. That’s key for places like this, where highlights can blow out if you don’t manage exposure.
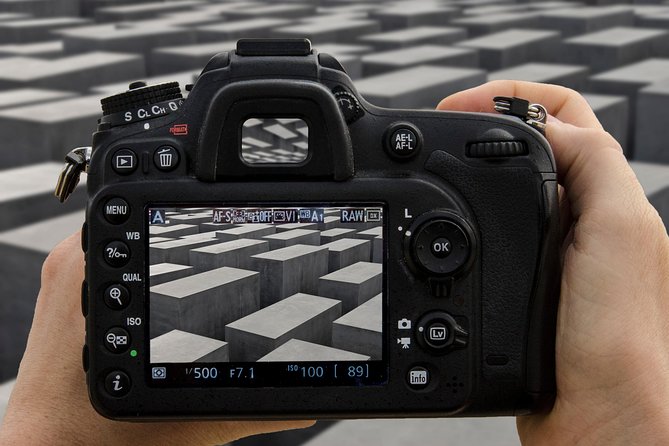
A big value of a private lesson is that you can ask questions while you’re standing in front of the building. If you’re working with a phone camera, compact camera, or interchangeable-lens camera, you can still benefit because the coaching tends to focus on practical use of your gear.
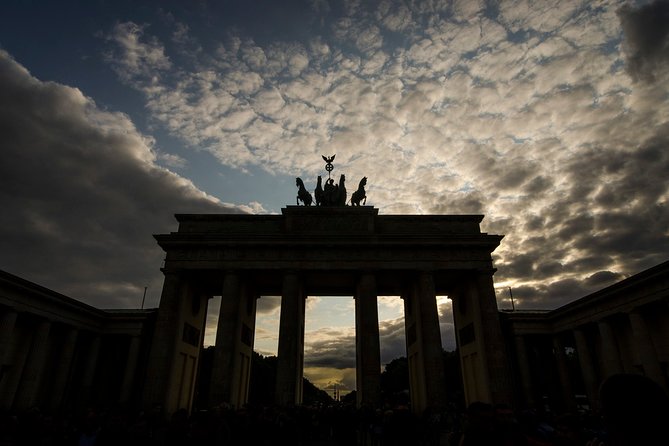
Brandenburg Gate to Potsdamer Platz: symmetry, street life, and setting choices
Next up is the Brandenburg Gate, followed by the lively Potsdamer Platz area. These two stops teach different photo skills even though they’re both “must-shoot” Berlin icons.
At Brandenburg Gate, you’ll likely want to focus on composition and alignment. The structure practically asks you for symmetry, but you still need to decide what you want the viewer to notice first. The guide can help you choose a framing approach so the scene feels intentional.
Then you hit Potsdamer Platz, where the challenge shifts. This is where you start thinking about how Berlin moves—people, traffic flow, and reflections from street-level lighting. Even if you’re mainly thinking about night photography later, practicing exposure decisions during daytime makes it easier to translate those habits after dark.
If you’re the type who gets overwhelmed by too many settings, this is where the instructor support matters. Past feedback includes praise for guides who explain camera features and help you choose settings you can actually remember.
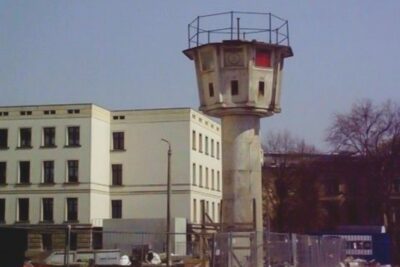
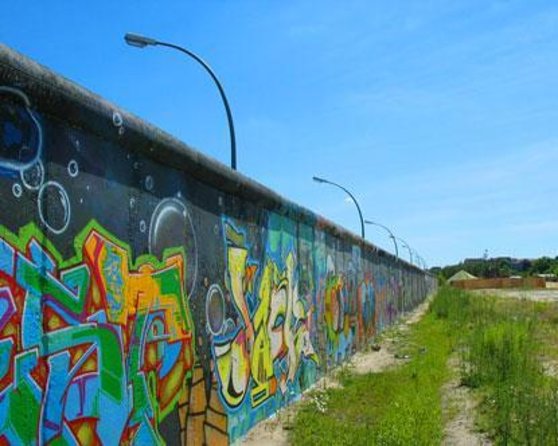
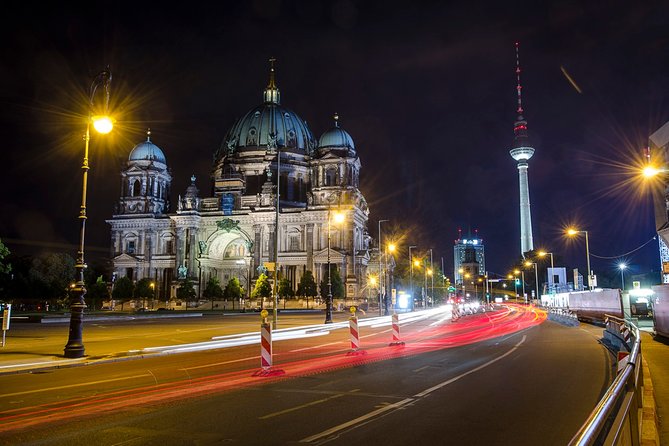
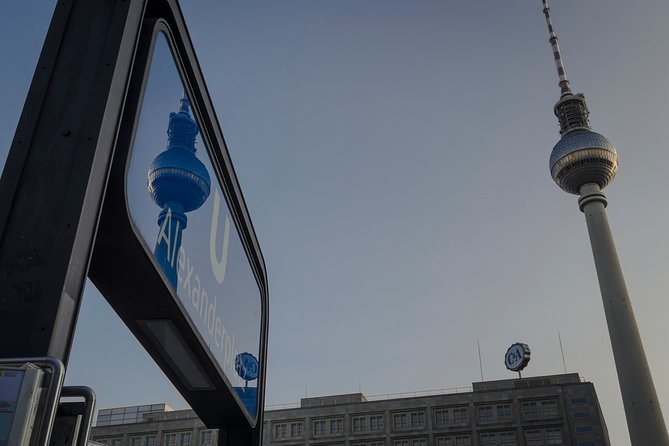
Berlin Wall and Alexanderplatz: textures, contrast, and night-ready exposure control
The Berlin Wall stop is where the tour becomes more than “take photos of famous places.” You’re photographing history through details: surfaces, edges, and the way Berlin has arranged meaning into space. Even if you don’t do a deep history lesson, you’ll still come away with a better eye for what makes a wall section photograph well—texture and contrast.
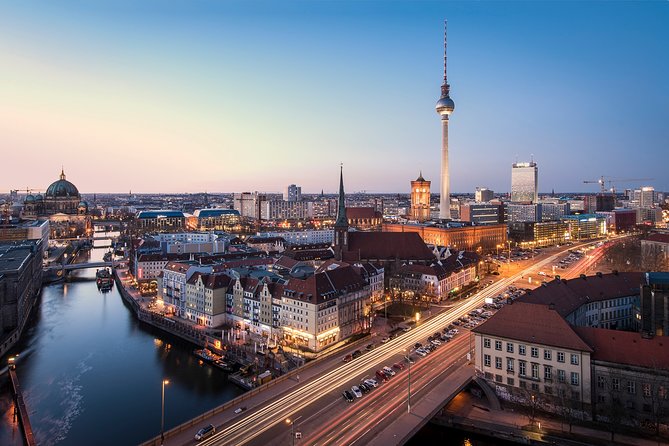
Alexanderplatz adds another skill set. It’s full of built forms, signs, and city lighting cues. That’s exactly the kind of environment where your camera can either capture the scene clearly or turn it into a bright, flat mess.
Night photography technique is listed as part of the experience, so this is a natural place to learn how to manage:
- bright highlights from streetlights and illuminated elements
- darker areas where shadows can swallow detail
- how to keep your subject readable when the background is busy
One guide was praised for reviewing photos with a critical eye and suggesting different approaches. That kind of feedback is gold here because it helps you see what’s going wrong, then fix it while you still have time to reshoot.
You can also read our reviews of more photography tours in Berlin


Oberbaum Bridge and the Modersohntraßer viewpoint: practice reflections and city depth
You’ll shoot the Oberbaum Bridge next, then you’ll head to a viewpoint from Modersohntraßer. This section is great for building a “how do I frame the city” mindset.
Oberbaum Bridge tends to deliver a strong subject with clear lines, and city photography often comes down to two things: angle and separation. If your camera is too focused on one edge, the whole image can feel off. With a guided lesson, you can experiment quickly—move slightly, tilt a fraction, change framing, and learn what works.
Then there’s the viewpoint. That’s where you learn to step back and think like a photographer, not a tourist. The goal is to capture city depth—layers of buildings and light—without losing the subject that anchors the shot.
Since night technique is part of the class, this is also where you can apply what you learn about exposure and light management. If you’re curious about how to handle darker skies or how to keep lights from turning into harsh blobs, this is the practical setting to test it.
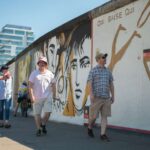
East Side Gallery to Nikolaikirche: telling a story with close-up detail and calm composition
The East Side Gallery is next, followed by the Nikolaikirche. These two stops pair well because they encourage different types of photography.
East Side Gallery pushes you toward details: textures in murals, the way paint interacts with surfaces, and the importance of deciding what portion of the scene your photo tells. A guide can help you avoid the classic mistake of trying to capture everything. Instead, you’ll practice selecting a focal point and composing around it.
Then Nikolaikirche shifts you toward calmer, more architectural framing. Church buildings can be tricky in cities because surrounding space can crowd your shot. Learning to manage the frame—what’s inside and what you cut out—often makes the difference between a photo that looks like a snapshot and one that looks like you meant it.
If you’re new to photography, this is also where the patience factor matters. Past feedback praised guides who were easy to work with and helped people learn not just night photography, but also how to use their camera. That kind of support helps you stay relaxed enough to think creatively instead of fighting your settings.
Berliner Dom and Gendarmenmarkt: how to finish with strong architecture shots
You’ll end with the Berliner Dom, then the Gendarmenmarkt. These are classic Berlin landmarks, and the lesson here is about finishing with a set of images that feel cohesive rather than random.
At Berliner Dom, the main photo temptation is to go wide and try to capture everything. The guided approach can help you pick a framing that gives the viewer a clear “why this photo” moment—choosing a perspective that emphasizes the building’s form.
Gendarmenmarkt is different. It’s a place where composition and timing matter. Even without specific timing details, you can still learn how to handle contrast so the scene doesn’t end up too harsh in bright conditions or too flat when light drops.
One practical thing I like about ending the route at recognizable, photogenic squares and major landmarks: by the time you reach these stops, you’ve already practiced the technique pieces earlier in the walk. That means your last images are often the ones where you apply coaching most successfully.
What you learn on the walk: technique coaching you can actually repeat
The headline here is learning. Not just “take pictures,” but learning how your camera decisions affect the final shot. Past experiences include a few clear themes.
First, guides have been praised for being patient and friendly teachers who spend time on technique. One person highlighted Gareth for being the nicest person they met in Berlin and for teaching lots of photographic techniques in a way that was easy to follow.
Second, night photography instruction is a core part of the experience. One review specifically called out Marzena Skubatz for knowledge and for teaching night photography plus how to use the camera. Another person said the tour was excellent and that they learned new tips to take better pictures.
Third, expect some form of feedback on your photos. One review mentioned Alexia reviewing pictures with a critical eye and recommending alternative approaches and techniques, plus advice on continuing after the tour.
What this adds up to for you:
- You’ll likely leave with a clearer sense of what to change first when a photo doesn’t work.
- You should feel more confident about how to translate night photography ideas into your own camera settings.
- You’ll have a repeatable workflow for shooting architecture and city scenes, since you practice it across multiple Berlin photo icons.
Is this good value for $180.04? Yes, if you want coaching, not just sightseeing
Three hours doesn’t sound long, but it’s enough time to learn if your guide is teaching while you shoot. At $180.04 per person, you’re paying for two things: the photographer guidance and the fact that the lesson happens in real places with real light.
Here’s the value logic I’d use:
- If you’re the type who likes to take photos but often feels unsure about settings, this can save you time later. You’ll get a teacher’s shortcut for what matters.
- If you’re already comfortable with basics, this still helps because night photography and architectural shooting often expose weaknesses you don’t notice when you shoot only daylight snapshots.
- If you’re hoping for a long, slow tour with plenty of time to wander on your own, this might feel tight. The route includes many major photo stops in a limited time.
So the decision comes down to your goal. If your goal is better photos with less guesswork, this is a strong use of your time in Berlin.
Who should book (and who might want a different type of photo tour)
You’ll likely love this if:
- you want a private lesson style experience with a max of 4 people
- you’re interested in night photography technique as part of a city walk
- you want coaching while photographing major Berlin icons
- you’d rather ask questions during the shoot than figure it out later
You might want a different approach if:
- your top priority is spending long periods at one site (this route covers a lot)
- you prefer a slow, unstructured walk without instruction
- you expect museum-style stops rather than an outdoor photo route
Should you book this Berlin photography masterclass?
I’d book it if you want hands-on photo improvement in a short Berlin window, especially with night photography guidance built in. The small group size and the fact that you’re working with a professional photographer guide make it feel like a real lesson, not a generic tour.
Skip it only if you want lots of downtime at a single location or you’re set on sightseeing without camera coaching. If you’re excited to leave with practical technique you can use the next time you’re out shooting, this is an easy yes.
FAQ
How long is the Berlin Photography Masterclass?
It runs for about 3 hours.
Where does the tour start?
The start point is Brandenburg Gate, Pariser Platz, 10117 Berlin, Germany.
Where does the tour end?
The activity ends back at the meeting point.
Is the tour private?
Yes. It’s listed as a private tour.
What group size should I expect?
The maximum is 4 travelers.
What languages are offered?
The tour is offered in English.
What is included in the price?
A local guide and a professional photographer guide are included, along with the private tour.
What is not included?
Drinks are not included.
Does it run in bad weather?
Yes, it operates in all weather conditions, so dress appropriately.
Is there a cancellation window?
Free cancellation is available. You can cancel up to 24 hours in advance for a full refund.